Installing the Batteries
Installing the Batteries
Battery Box Plans
To see the updated battery heater installation from March, 2009, go to this page.
Planning for the installation of the batteries started very early in the project. I'm creating well insulated, heated boxes so that the lead-acid batteries I'll use initially for the car won't lose too much range during the frigid Minnesota winters.
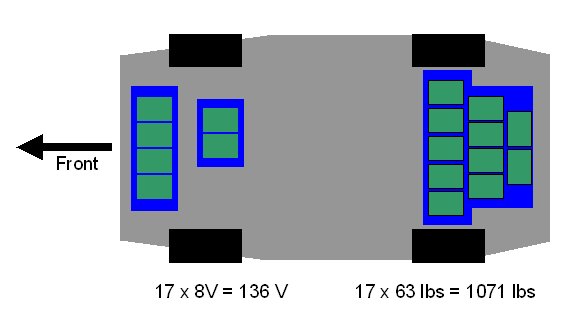
I'm putting 6 batteries under the hood and another 11 inside the trunk. I want to keep them out of the passenger compartment both for safety reasons and so that I have room to carry 4 or 5 people in the car. I had planned to use 18 flooded lead-acid golf cart batteries at 8V, for a total pack voltage of 144 VDC. As the project progressed, however, I found that the space for the batteries shrank before my eyes. The use of foam insulation around each of the battery boxes really cut into the available space, and I ended up with enough space (barely) for 17 batteries. I'm mounting them low in the car (the bottom of the boxes are at the same level as the lowest nearby suspension parts) to keep the center of gravity low. This will help somewhat with handling. Because I didn't put the batteries in the passenger compartment, however, a lot of the weight ends up at the very front and very rear of the car. Probably not optimum for handling but a resonable compromise for passenger safety.
I also made sure that in mounting the battery racks I didn't cut into any structural members of the unibody, and I preserved the beams in the front and rear of the car that form the crumple zones. In the design of the racks I thought a lot about creating enough strength to prevent the batteries from entering the passenger compartment if the car were to be an unwilling participant in an accident.
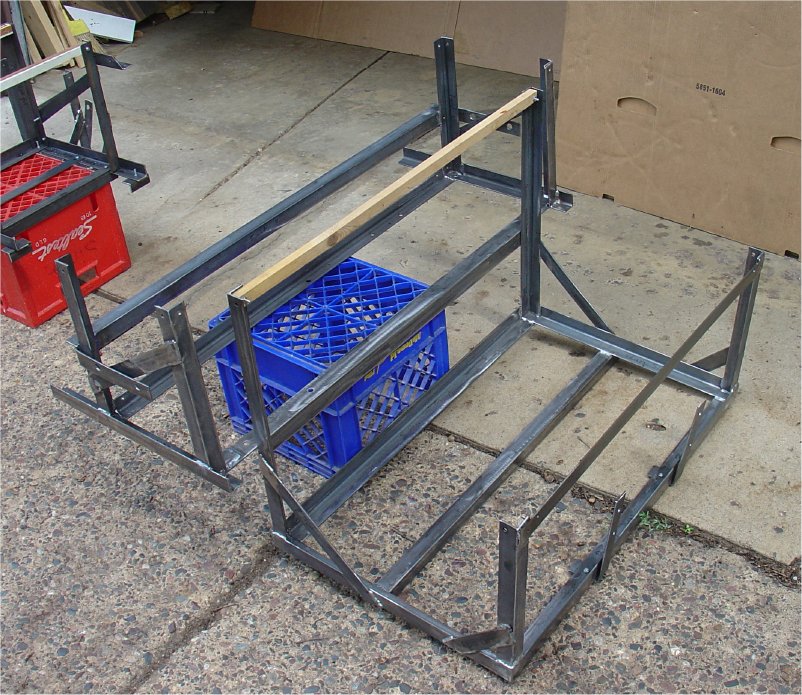
The racks are constructed of 1 1/4 inch (and 1 1/2 inch where more strength is needed) angle iron, 1/8 inch thick. I've got a total of 4 racks - two in the front and two in the rear. They will be lined with fiberglass reinforced sheeting (found at Menards - used as bathroom paneling.) Glued to the fiberglass will be foam sheets - 1 inch thick were it will fit. The inside of the boxes will then be lined with another sheet of fiberglass sheeting, to make a rigid sandwich. (I'm still looking for a good adhesive to glue the fiberglass sheets to the foam.) The floor of the boxes will have rigid cross members running periodically through the foam to provide a solid base for the heavy batteries. I'll also securely fasten down the batteries inside the boxes.
I painted the metal racks with a product called 1-Part Epoxy. Seems like it will provide very good protection from rust and battery acid at a cost much lower than powder coating. I used TS-900 primer and TS-100 1-part epoxy paint in "safety blue". One-part Epoxy from Top Secret Coatings
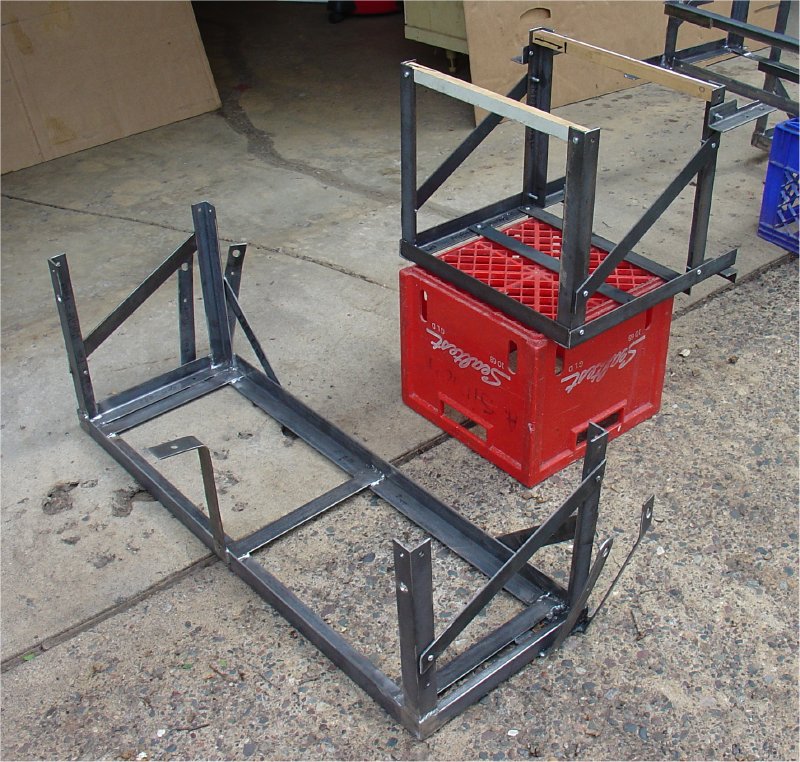
I recruited some volunteers to test the front battery racks. They didn't collapse.

The links below show the front and rear battery racks before adding the insulation.
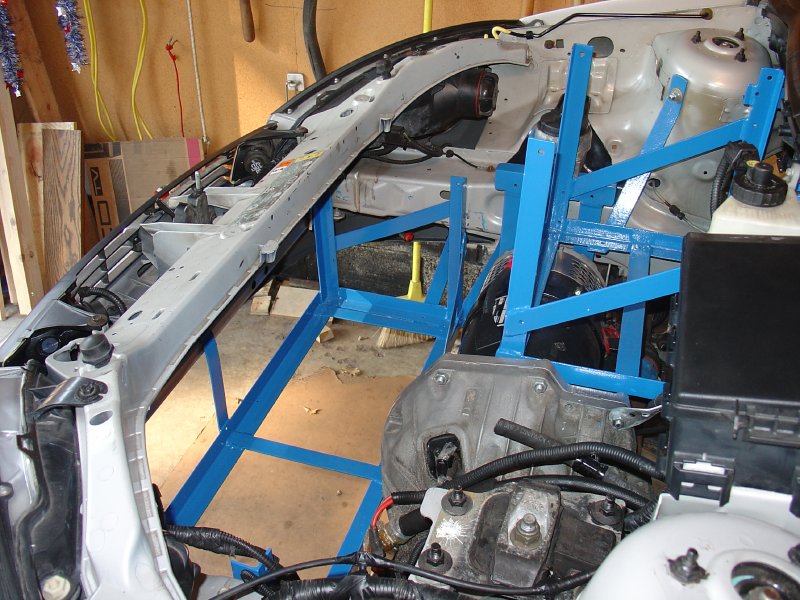
Front racks after painting and installation under the hood
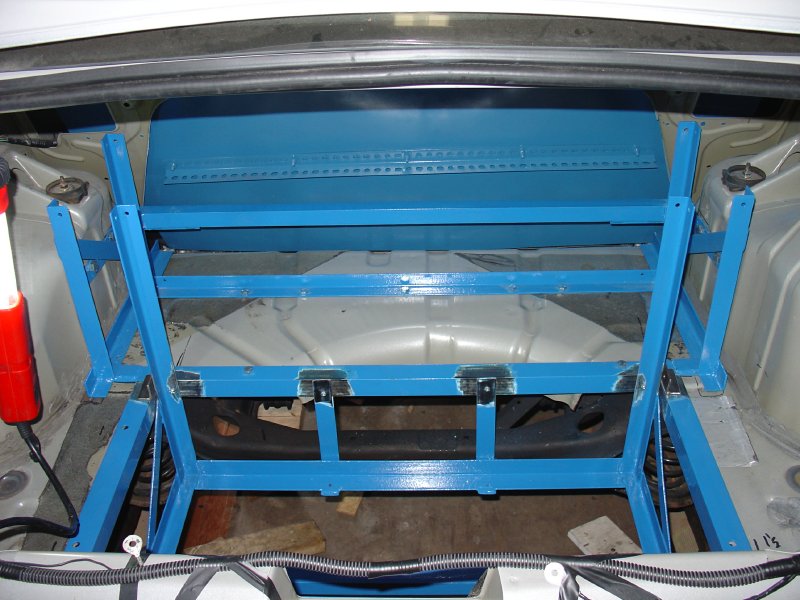
Rear racks after painting and installation in the trunk
In the last picture you can see the blue sheet-metal in the background between the trunk and the back of the rear seat. This will be bolted in place to provide protection of the passengers in the unlikely event of a battery explosion or a plasma fire. (Highly unlikely but you can find spectacular stories on the web of such events.)
Here's a humorous movie tour of the battery racks in the car.
Fiberglass Sheets and Insulation
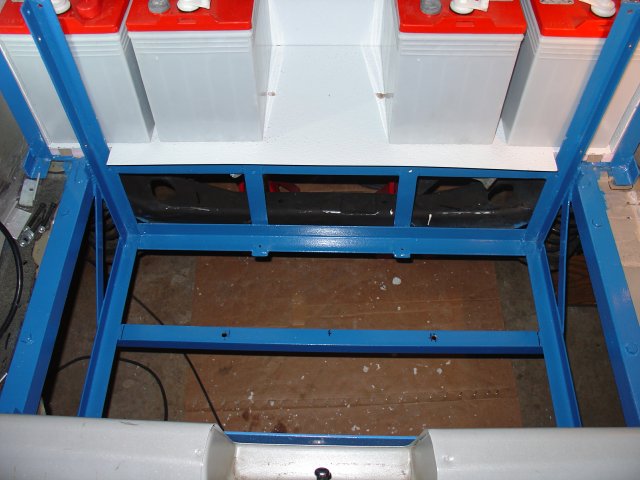
The sequence of pictures below shows the steps used for insulating the battery boxes. I used Fibreglass Reinforced Panels (FRP) from the local Menards builder's supply (also carried at Home Depot.) They are 4 ft. by 8 ft. panels, a little under 1/10th of an inch thick. They are typically used for paneling in bathrooms and are waterproof and very tough. I placed one layer directly against the angle iron of the battery rack, then glued a layer of 1 inch thick extruded insulation against this panel. Then I put another layer of FRP inside for the batteries to sit on. The floor of each box was reinforced with 1 inch wide strips of plastic deck material. These strips were spaced about 6 inches apart and they sit over the angle iron at the edges of the box, so they take the weight of the batteries. I used polyurethane construction adhesive in a caulk-gun tube to glue everything up.
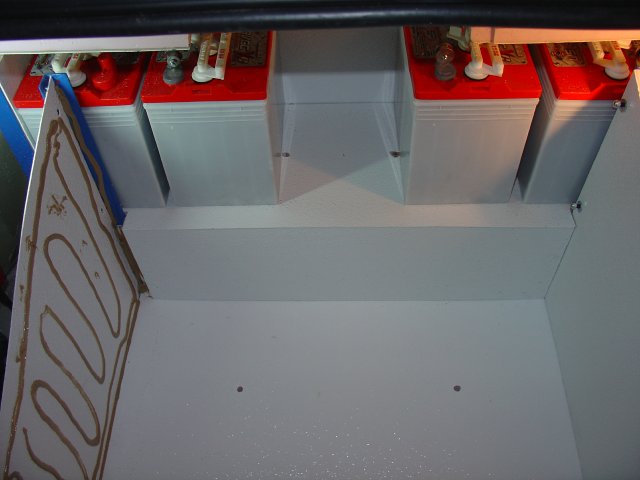
Step 1: The racks before the panels are installed.
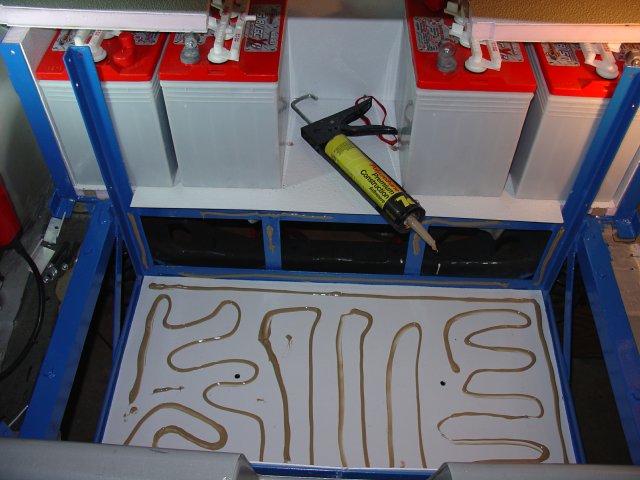
Step 2: Glue the bottom panel in place and spread adhesive on top.
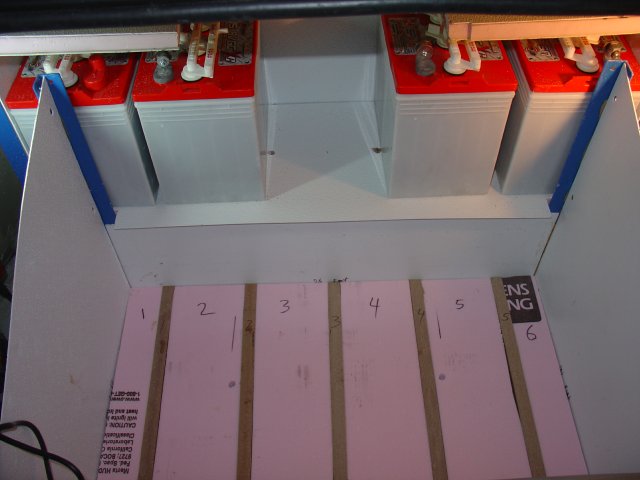
Step 3: Install the side panels and put down the decking strips with foam in between.
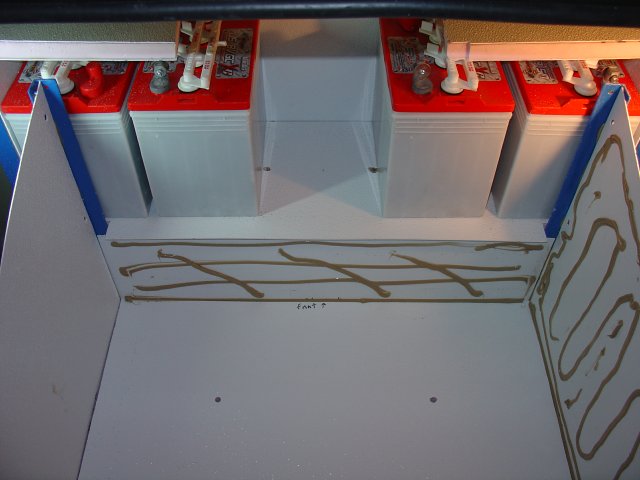
Step 4: Adhesive on top of the foam, ready for the inside bottom panel.
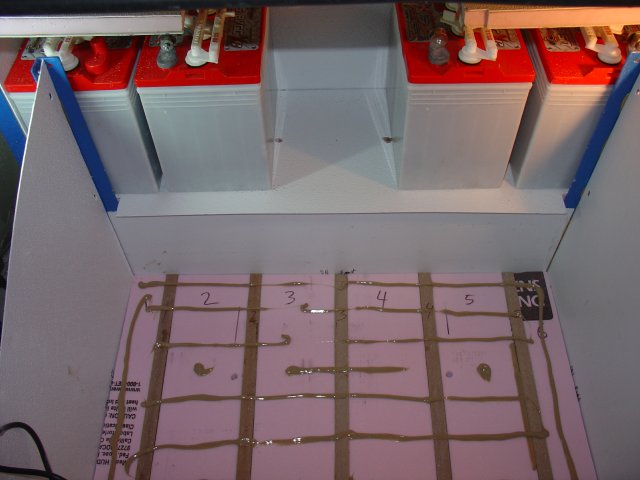
Step 5: Install the bottom FRP and put adhesive on the sides, ready for the foam.
Step 6:Install foam on 2 sides (the inside FRP had already been glued to these pieces).
Step 7: Add the final side foam and FRP, clamp the sides, and put batteries in until the adhesive cures. (The wood is temporary to spread the clamping pressure.)
Battery Box Heaters
I bought slicone-rubber heater strips from McMaster-Carr. These lie below the batteries and get 110 VAC power from a plug that is separate from battery charger power. I put 75 W heater strips in two places (front box with 4 batteries, rear upper box with 5 batteries). I put a 60 Watt heater strip in the mid box (under the hood with two batteries - not insulated as well as the others) and two heater strips with a total of 105 Watts in the rear lower box with 6 batteries. Heater power will be controlled by a bi-metallic thermostat - one per battery box. Each thermostat will be in contact with one of the batteries it controls, and will switch off when the batteries get above 65 degrees F (I may go to a higher temperature version later.)
The batteries will sit on rubber sheets (cut from truck mud-flaps) that are slightly thicker than the heaters, so that the heaters aren't damaged by the weight of the batteries.
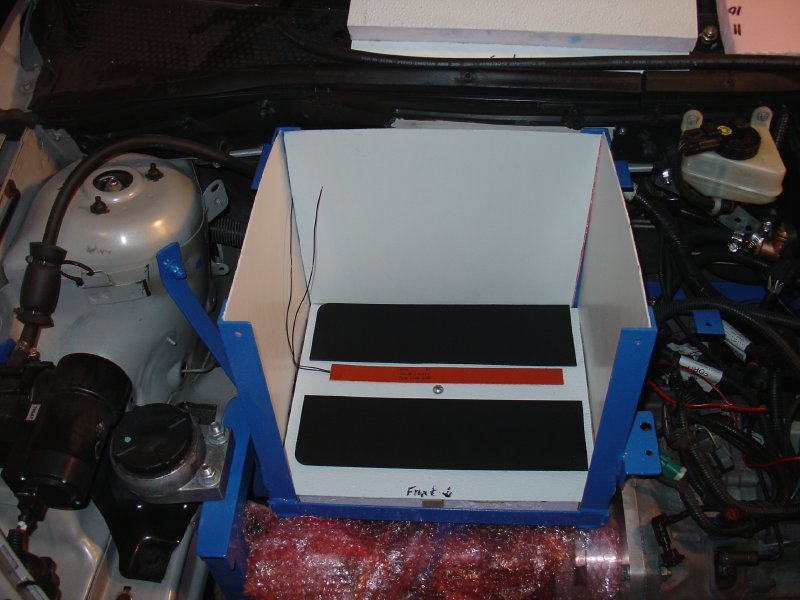
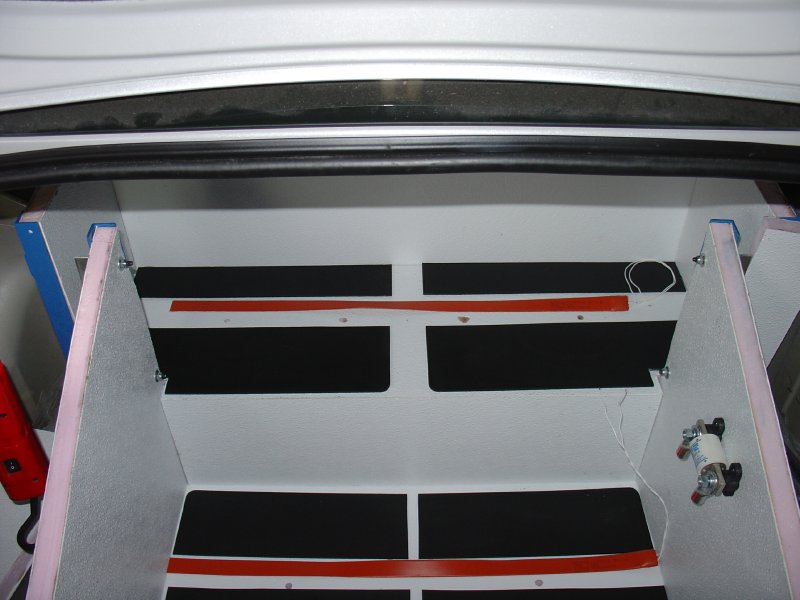
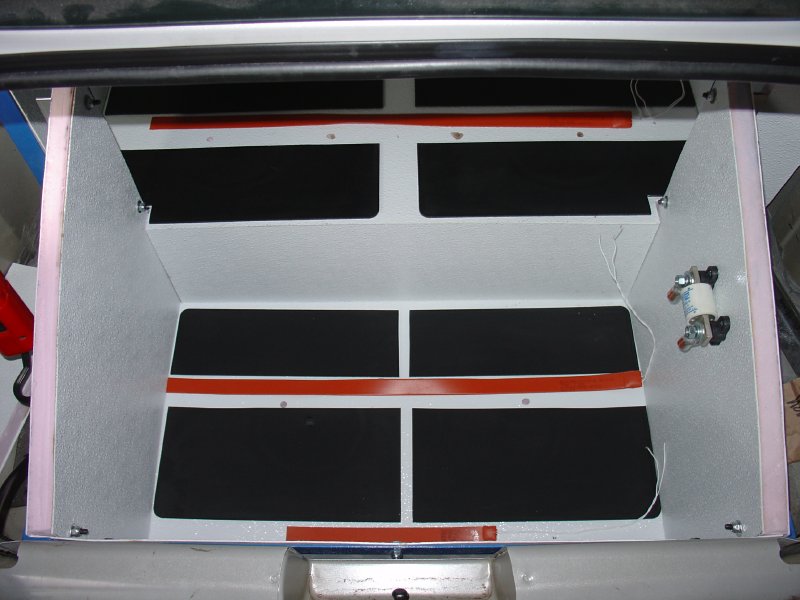
The pictures below show the inside of each of the boxes with heaters (orange) and rubber sheets (black). You can also see the holes where the hold-down bolts will come through the bottom of each box.
Front battery box - looking down from above. 4 Batteries will go here.
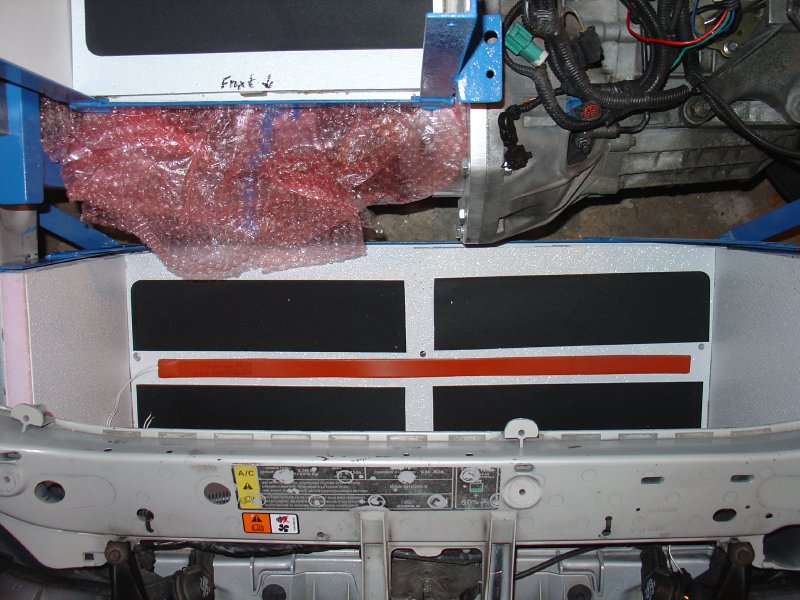
Mid battery box. This will hold two batteries.
Rear upper battery box. 5 batteries will fit on the upper shelf.
Rear lower battery box. 6 batteries will live down here.
Under the rear Seat
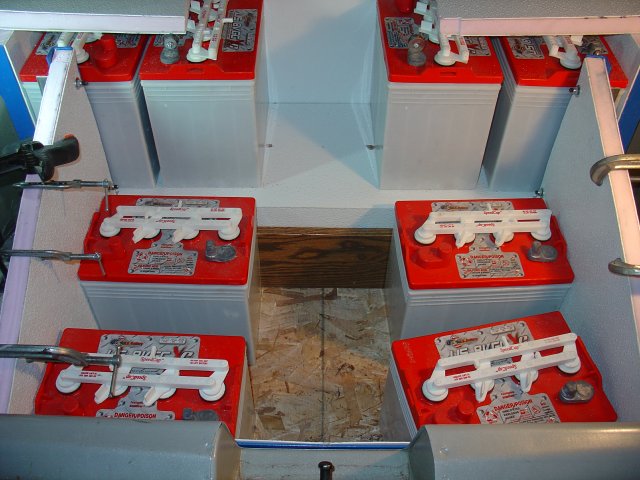
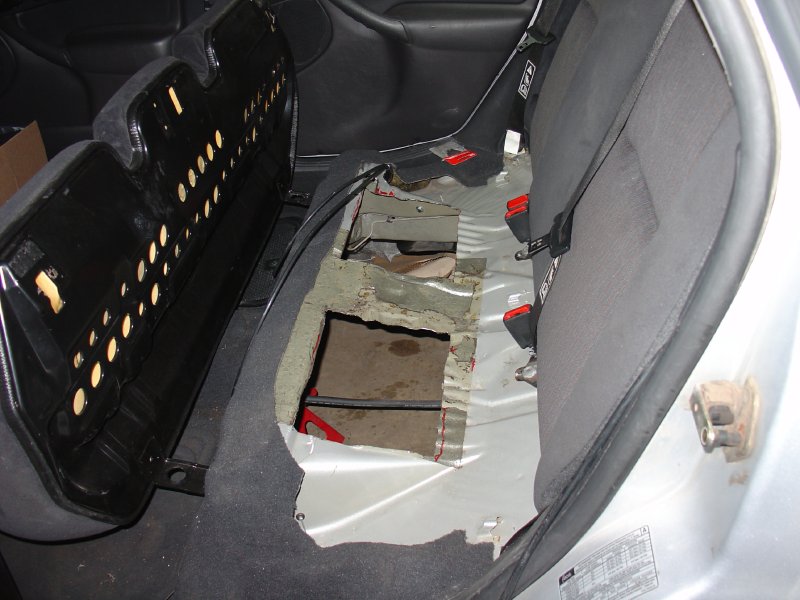
I placed the Auxiliary 12V battery and the DC/DC converter in metal boxes that I sunk into the floor beneath the rear seat. This is in the area that was formerly occupied by the fuel tank. The picture below shows the cut-outs for the two boxes - each is roughly 8 inches by 10 inches.
Holes beneath the rear seat
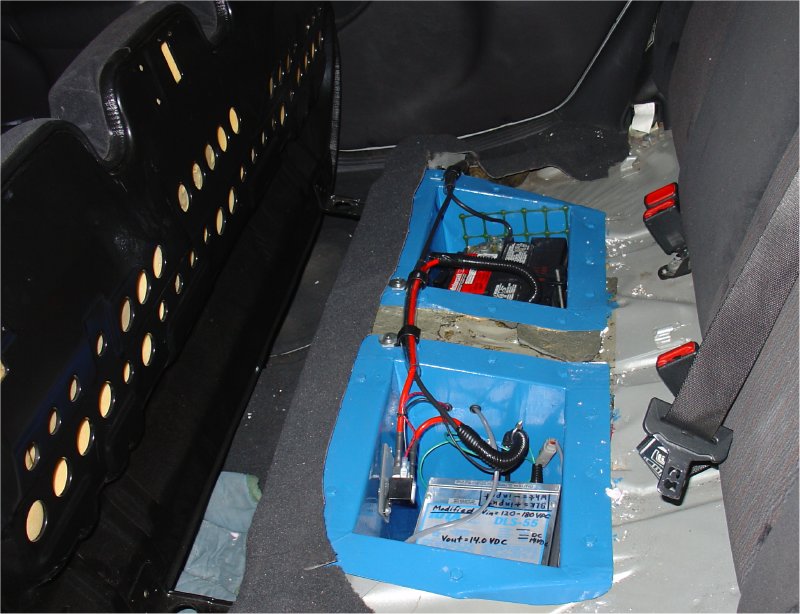
And here's the finished installation with the DC/DC converter in the near box and the auxiliary 12V battery in the far box. When the key is turned off the main contactor disconnects the DC/DC converter input power and a 12V, 70A relay disconnects the DC/DC converter output from the battery.
Finished Installation
Updated 19MAR2009 CHS