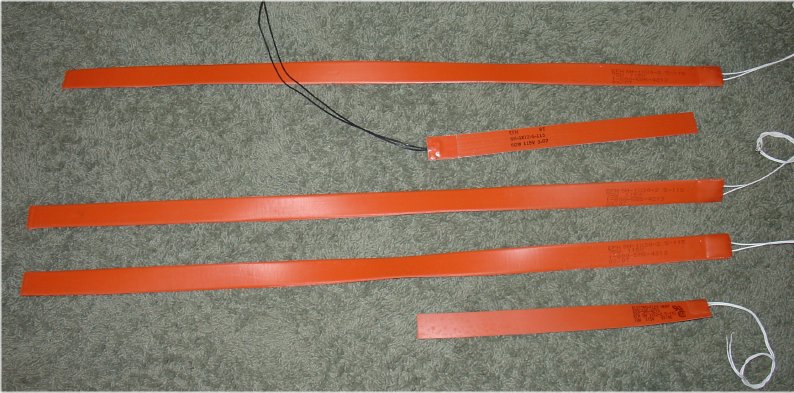
New Arrangement For the Battery Heaters
Silicone battery heater strips which range from 30 watts each to 75 watts each.
New Arrangement For the Battery Heaters
Silicone battery heater strips which range from 30 watts each to 75 watts each.
My original battery heater installation was not quite successful. A few minutes after plugging in I detected a strong smell of burning plastic. Not good!
I didn't use the heaters much in this condition and eventually found time (in the subzero temperatures of a Minneosta January) to removed them from under the batteries. I discovered that even though they had seen little use the heaters had turned the white fiberglass panels on the bottom of the battery boxes an intersting shade of brown.
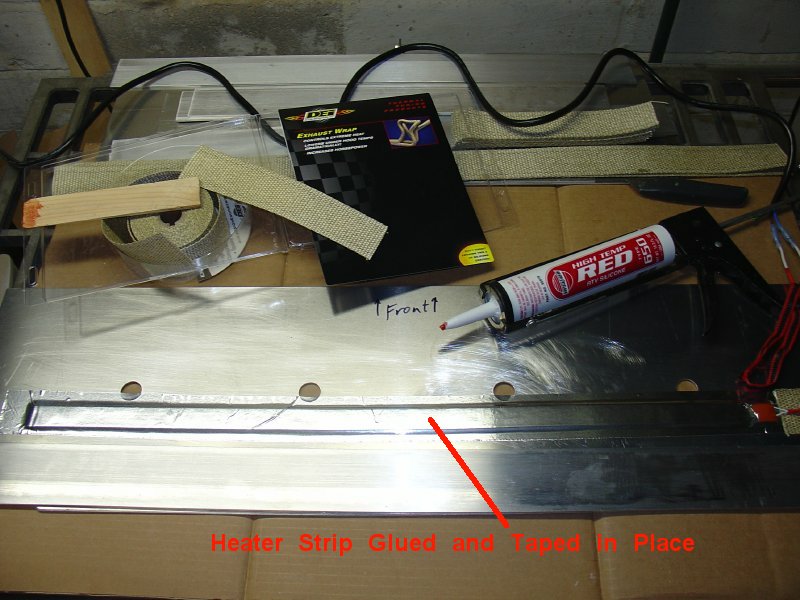
For my second attempt I had to remove most of the batteries from the car and pull out the heater strips. They were still intact so I re-used them - this time securing them to the side of the batteries with aluminum tape. (Available from a home building supply store.) The tape held the heater strips in close contact with the batteries and it reflected the heat towards the batteries.
This approach was an improvement but soon after this was completed another EV converter, who had used the same type of heater strips in a similar arrangement, found that he had fried the heaters and burned through the plastic on two of his rather expensive batteries. After learning this I again stopped using the heaters (which means that I didn't drive the car more than about 13 miles between charges) until I could come up with a better arrangement.
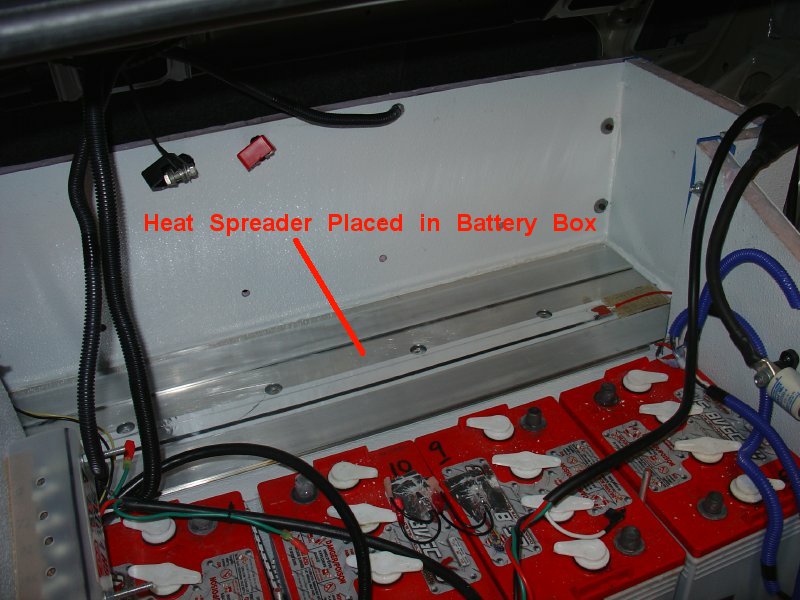
I have now completed the third battery installation, using aluminum heat spreaders, and it appears to be a much better approach. To do this I had to remove all of the batteries from the car for a second time.
The theory with this new approach is to spread the heat from the 1 inch wide heater strips over a much wider contact area with the batteries. While doing this I need to isolate the heaters from direct contact with the batteries and isolate the heat spreader from the bottom and sides of the battery boxes. I also need to keep the heat spreader thin enough to keep the batteries below the top of the battery boxes.
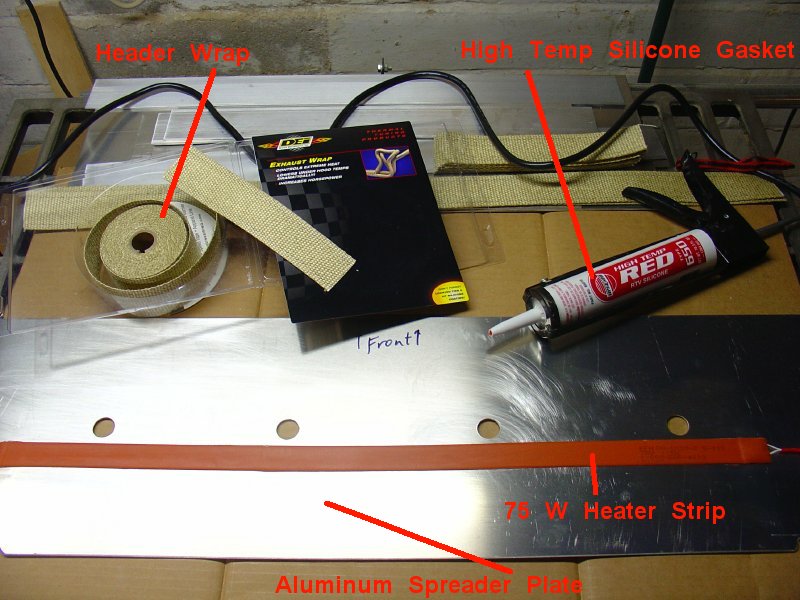
To accomplish this I purchased plates of 0.1 inch thick aluminum from Discount Steel. These plates were cut to fit within the battery boxes and lie beneath the batteries. The heater strips are glued down to these plates. I also purchased slightly thicker 1/8 inch by 2 1/2 inch wide aluminum spacers that lie beside the heater strips - resting on the aluminum plates. The batteries set on top of the 1/8 inch thick spacers so that they don't directly contact the heater strips. So the batteries are more gently warmed through contact with two spacers having a combined contact area of 35 square inches per battery vs. the 7 square inches that previously transferred the same heat.
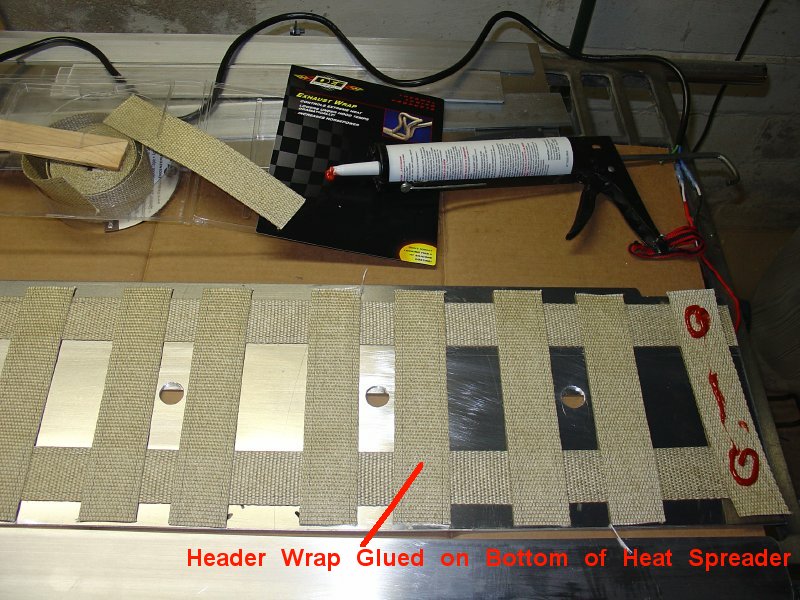
To isolate the bottom of the aluminum heat spreaders from the battery boxes I cut and glued strips of fiberglass insulation tape to the bottom of the plates. These insulation strips are overlapping so that there are two layers between the aluminum and the battery box lining. The material I found for insulating is a roll of "header wrap" that's designed to wrap around hot exhaust components in an internal combustion car. It's rated for over 1000 degrees. The adhesive that I used is automative silicone RTV, available from an auto parts store in a tube that fits a caulk gun and is rated for 650 degrees.
After assembly was completed I plugged the heater in for over an hour with no batteries on them. The spacers got hot to the touch but not so hot that you couldn't hold you hand on them for a few seconds. When I ran the heaters with a few batteries resting on the spacers it didn't get nearly as hot, since most of the heat was going into the massive batteries.
The pictures below show the assembly process for one of these heat spreader plates. The 0.1 inch thick plates are substantial enough to carry the heat out to the 2 1/2 inch wide aluminum spacers that transfer the heat to the base of the batteries.
Step 1: Heater strip glued to the spreader plate
Step 2: Aluminum tape over the heater strip, to reflect heat into the spreader plate
Step 3: Glueing the insulation on the bottom of the spreader plate
Step 4: 1/8 inch thick spacers next to the heater strip
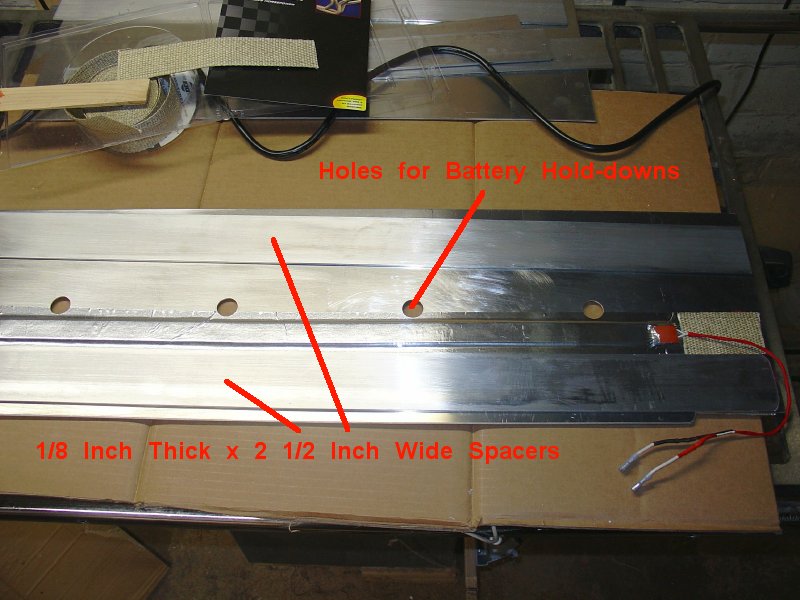
Step 5: The whole assembly in the car, ready to add batteries and hold-downs
I've now tested the new heaters in the car by plugging them in and doing the sniff test - it smells like gently warming batteries rather than the fragrance of burning silicone and fiberglass!
Updated 19MAR2009 CHS